Demo Create an EBS Volume
In this post we shall take a look at how we can practically create the EBS volume or the Elastic Block Store volume.
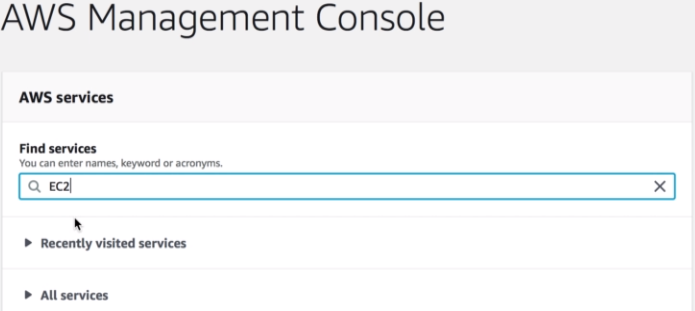
So let's say you are inside your AWS management console.
So in the Find Services all you have to do is do an EC2,

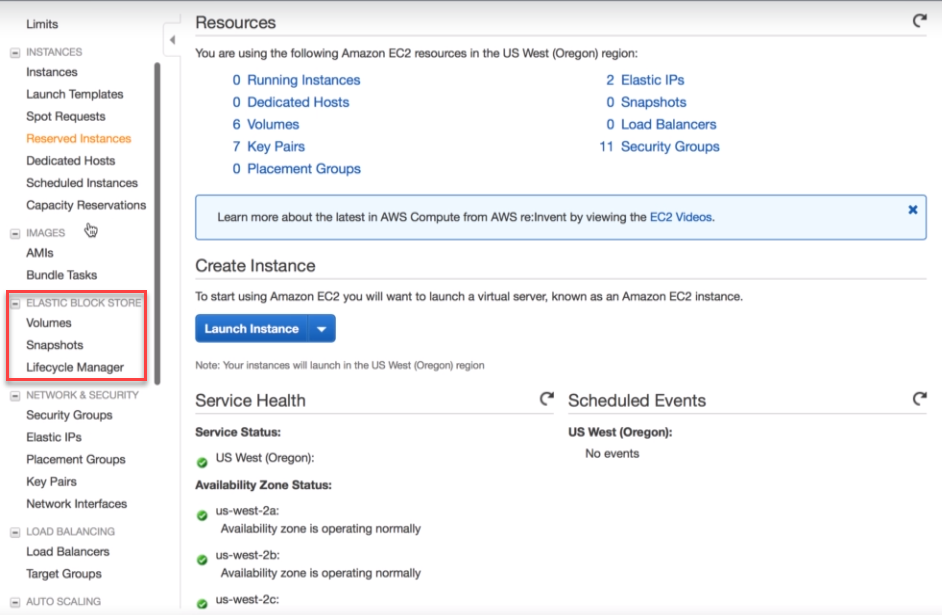
So go to that EC2 dashboard, so when you click on EC2 you'll see that on the top left corner you can see the EC2 dashboard.
So inside that EC2 dashboard if you scroll down you'll see something like EBS which is that elastic block store and we click on the Volumes button here you can see some of the volumes that I've actually created.

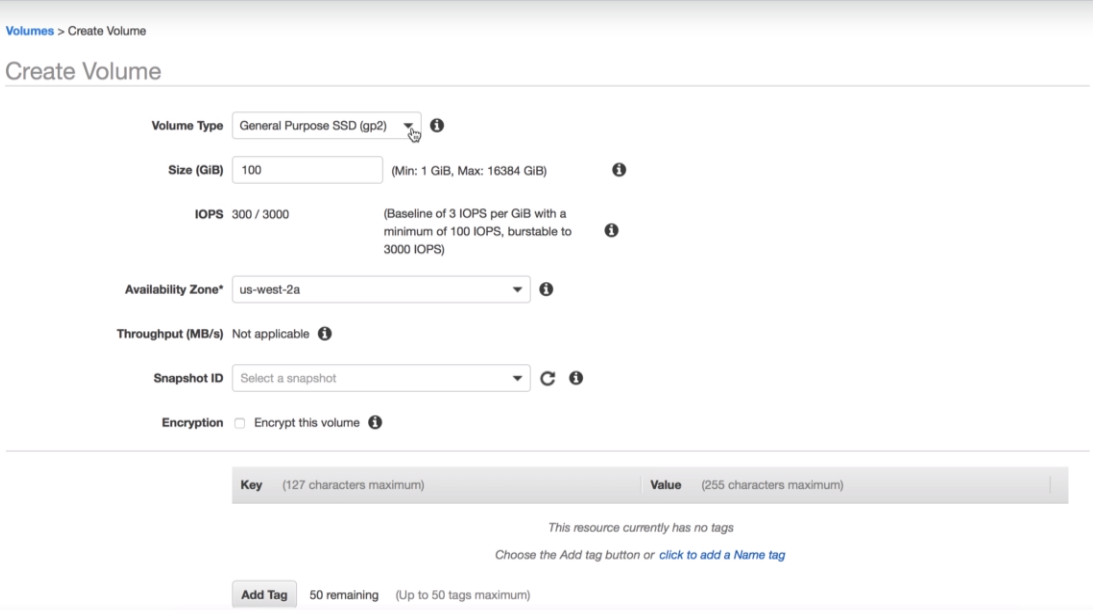
And since we have to create a new one we just say create volume.


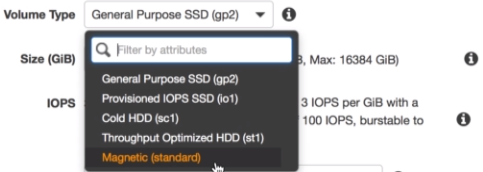
So in the Volume type we get different kind of disks, So as we discussed in the theoretical part you do get an option of SSD or you get an option of HDD so you can choose based on whatever is a your use case and as we discussed there are different use cases where SSDs and HDDs.

So in our case we just use a general purpose SSD and then comes the size.
So I'll just keep something around 50G because I have to use this volume for actually installing Oracle XE.
That will be my Oracle 18c XE so I'm just keeping to 50G and then you are given an option to choose your availability zone So because we are in Oregon region.
So in Oregon region we have three Availability Zones one is the us-west-2a, us-west-2b, us-west-2c

Let's choose the first one then comes the Snapshot ID , Snapshot ID means that if you are actually creating a volume using some snapshots or if you just scroll over to the i button  you can see the snapshot with which to create the volume if required.
Since we are creating a new volume and we are not using any of the existing snapshots we can leave it as it is.
Then comes the Encryption thing you might remember that I told you that it allows encryption before the Data at Rest and Data in Transit.
But it is something that you can either enable or disable as you have to enable it you just click on it for them well this is really disabled.
And then you can add a tag so tag is something like a name value pair and this I can say name something like say oracle_db.

So just make sure that this volume will actually be used by the Oracle database and all you have to do is just click on Create volume  and your volume gets created. It's as quick and within I think it was hardly half a second and the volume gets created.

So here you can see that was a benefit of using the TAG actually because I specified the TAG.
And you can see it shows me oracle_db thats my volume ID that's you might see and this would be actually used when we attach these volumes then you have the size 50 gig and you know the volume type the kind of IOPs it allows and when it was created and the Availabilty Zone.

So now out of all these volumes you can easily differentiate which is the volume that you have created and will be actually using this volume when we create our Oracle 18c database and recreate it in Oracle 18c XE machine.

Happy Learning !!!
DB Alchemist Academy
You may explore our E-Learning Page to have an insight into our High Rated Courses on Udemy and Enrol to the Complete Course.


Share you comments
{{ errorMessage }}